I currently use a pair of Swans Hi Vi RT1II Isodynamic Ribbon Tweeters which I have added to my main speakers, these are placed on top of my main speakers and add more ambience, timbre, detail, presence and aire to the music.

Pic 1: Dimensions.

Pic 2: Frequency Response.

Pic 3: Impedance.
Information on the Swans Hi Vi RT1II Isodynamic Ribbon Tweeters:
Film membranes, shielded Neodymium magnet systems and aluminum faceplates. Distinguishing features are almost perfectly flat impedance with fantastic speed, resolution, and transient response.

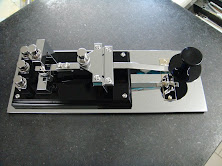
Pic 4: Front of Ribbon Tweeter.
The conductors cover about 90% of the whole vibrating area. The membrane assembly is precisely placed between two rows of Neodymium bar magnets. It is also well suited for 3-way applications This tweeter is magnetically shielded and is an extremely flat driver. A larger membrane and radiating area, providing higher power handling and a substantially lower cut off frequency.

Pic 5: Rear of Ribbon Tweeter.
The large membrane is thermally attached to the cast aluminum faceplate providing cooling and dramatically increasing dynamic range. Harmonic distortion is only 0.7% (94dB SPL) and has 106dB the output of continuing sound pressure and 110 dB SPL minute peak response. The RT1ii is available with different faceplates. RT1ii possesses unsurpassed clarity, transparency, and the ability to deliver every tiniest musical detail. Since RT8ii has exceptional ability to reveal the dynamics of instruments and sonic resolution, it is recommended to match it with drivers having similar properties in order to maximize the overall integrity of a speaker system. Always use an inline capacitor to protect the ribbon -
0.47 uF Audiocap Theta + 1.0 uF Audiocap Theta.

| RT1II Isodynamic Tweeter |
| Nominal Impedance (Z)(Ω) : | 5 |
| Nominal Power Handling (Pnom)(W) : | 15 |
| Sensitivity (2.83v/1m)(dB) : | 93 |
| Weight (M)(Kg) : | 0.30 |
| Magnet System : | Neodymium |
| Recommended Crossover Frequency(Hz) : | >3500Hz |
An extract from Yahoo Guides: by:
camino3x2 Ribbon, Quasi-ribbon, and Magneplanar drivers
 all work on the same principle. The difference is how much of the driver surface is also the electrical conductor. In each case, a thin membrane which may be aluminum foil, high-grade Polyester or Kapton (but if you imagine it as household aluminum foil or plastic wrap, you'll have a good mental image) stretched and anchored in some kind of frame. The frame also secures permanent magnets close to the conductor. The aluminum foil is conductive on it's own, the plastic film has a foil or wire conductor glued to the surface in some kind of pattern. The conductor (the sheet of aluminum, or the foil or wire gridwork on the plastic film) becomes magnetic because of the electrical current of the amplifier signal, and wiggles in the magnetic field produced by nearby permanent magnets. The wiggling moves the air, and so produces sound. So, to recap: There is a stable magnetic field supplied by a non-moving set of permanent magnets. The musical signal from your amp is supplied to the flexible conductor, which moves to produce sound.
Ribbon:
A ribbon driver is a flexible sheet of conductive material--aluminum foil for example--that is anchored on it's edges and passes the amplifier's output signal. The action of conducting electricity makes the conductive sheet an electromagent. Because it is located within the magnetic field of some permanent magnets, it is attracted toward and repelled away from those magnets, depending on which direction the alternating current of the amplifier's output is flowing through the conductive sheet. Because it wiggles back and forth, it produces sound of the same frequency as the amplifier signal. The entire sheet is conductive, so the entire sheet--within it's mechanical limits--is attracted and repelled by the magnetic forces. Because ribbons don't handle lots of electrical current very well, they are generally used only as high-frequency drivers--tweeters. A ribbon driver assembly can be mounted in a conventional box speaker, there are several commercially available loudspeakers that use a ribbon tweeter or supertweeter.
These pictures below are taken from
www.lcy.com.hk and are copyright of LCY

Click on above image to enlarge.

 Website: JeanneNewhall.com


 I currently use a pair of Swans Hi Vi RT1II Isodynamic Ribbon Tweeters which I have added to my main speakers, these are placed on top of my main speakers and add more ambience, timbre, detail, presence and aire to the music.
 Pic 1: Dimensions.
 Pic 2: Frequency Response.
 Pic 3: Impedance.
 Pic 4: Front of Ribbon Tweeter.
 Pic 5: Rear of Ribbon Tweeter.